Why Your Marine Hatch Seals Are Failing (And What to Do About It)
If you’ve ever dealt with a leaking hatch at sea, you know the sinking feeling that comes with discovering water where it shouldn’t be. Maybe it’s dripping into cargo holds, pooling around sensitive equipment, or worse—creating safety hazards during rough weather. The frustrating part? These problems often start small and snowball into expensive emergencies.
Here’s the reality: most hatch seal failures aren’t inevitable. They’re the result of three common issues that happen repeatedly across the marine industry—wrong material selection, poor installation practices, and reactive rather than proactive maintenance. Let’s break down what’s actually going wrong and, more importantly, what you can do to prevent it.
The Real Cost of a Failed Seal
Before we dive into solutions, let’s talk about what seal failure actually costs you. We’re not just talking about the price of a replacement seal.
When a hatch seal fails during operations, you’re looking at potential cargo damage that can run into thousands or millions of dollars depending on what you’re carrying. Electronics, documents, bulk materials—all vulnerable. Then there’s equipment corrosion. Once saltwater gets to your machinery, the clock starts ticking on repair or replacement costs.
But the hidden costs hurt even more. Emergency repairs mean unplanned port stops, schedule delays, and unhappy clients. Your crew has to work around compromised compartments, potentially in unsafe conditions. And if you’re in the middle of a voyage when the seal fails completely? You’re dealing with a safety crisis that could have been prevented.
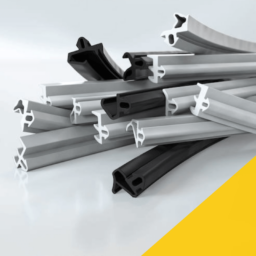
Problem #1: You’re Using the Wrong Material (And Here’s How to Know)
Walk onto most commercial vessels, and you’ll find a mix of seal materials installed over the years. Some are original equipment, others are “close enough” replacements sourced during emergency repairs. This mismatched approach is one of the biggest causes of premature failure.
The Temperature Trap
Here’s a common scenario: A procurement team orders EPDM seals for engine room hatches because “EPDM works great for marine applications.” They’re not wrong—EPDM excels in saltwater and UV exposure. But engine rooms regularly hit 50-60°C, sometimes higher. At these temperatures, even quality EPDM starts degrading faster than expected.
The solution isn’t complicated, but it requires thinking about your specific application:
- For external deck hatches exposed to sun and spray: EPDM is your friend. It handles -50°C to +150°C, resists ozone, and laughs at UV radiation. You’ll get 10-15 years of service life with proper maintenance.
- For engine rooms and high-temperature areas: Switch to Silicone. Yes, it costs more upfront. But Silicone maintains elasticity from -60°C to +230°C. It won’t harden or crack in heat the way other materials will.
- For hatches near fuel systems or hydraulic equipment: Use NBR (Nitrile) or Viton. These materials handle petroleum exposure that would destroy EPDM within months.
The Chemical Resistance Reality Check
Not all “marine-grade” seals resist all marine chemicals. If your vessel uses specialized cleaning agents, antifouling compounds, or carries chemical cargo, standard EPDM might not be compatible.
Do this: Make a list of every chemical your seals might encounter—fuels, hydraulic fluids, cleaning products, cargo residues, even the specific antifouling paint on your hull. Cross-reference this with material compatibility charts from seal manufacturers. If you see more than two “poor” or “not recommended” ratings, you need a different material or a custom compound.

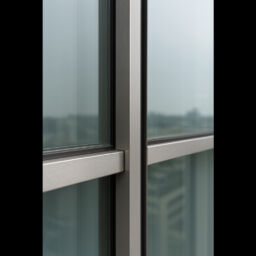
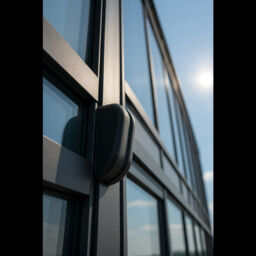
Problem #2: Installation Mistakes That Guarantee Failure
Even the perfect seal fails if you install it wrong. We’ve seen million-dollar vessels with premium marine seals that leaked within months because of installation errors anyone could have prevented.
The Compression Error
This is the most common installation mistake: wrong compression. Rubber seals need to compress 25-40% of their original thickness to create proper sealing force. Too little compression, and you get leak paths. Too much compression, and you accelerate degradation through permanent deformation.
Here’s how to get it right:
- Measure your hatch seal groove depth with calipers before ordering. Don’t guess based on the old seal—it’s probably compressed permanently.
- When installing, use a gauge to verify compression. If the seal compresses less than 20%, it’s too large. Over 50%? You’ll have premature failure.
- Check compression around the entire perimeter. Uneven compression means some sections seal well while others leak. This typically indicates frame alignment issues you need to address.
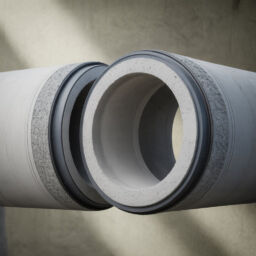
The Corner Catastrophe
Every hatch has corners, and corners are where most leaks start. Why? Because someone cut the seal, tried to splice it at the corner, and created a guaranteed leak point.
The fix is simple: Use molded corner pieces or continuous seals with vulcanized joints. If you absolutely must splice, use proper bonding adhesive designed for your seal material—not silicone sealant or super glue. Clean both surfaces with the manufacturer’s recommended cleaner, apply adhesive according to temperature and cure time specs, and clamp the joint for the full cure period.
Better yet: When ordering replacement seals, provide exact perimeter measurements and ask for a continuous seal with molded corners. Yes, it costs more. No, it’s not optional if you want reliability.
The Cleaning Mistake Everyone Makes
You’d be surprised how many seal failures trace back to one thing: someone cleaned the groove with the wrong solvent.
Before installing any seal, the groove must be spotless—no salt residue, old sealant, or surface contamination. But using aggressive solvents can damage the groove coating or leave residues that accelerate seal degradation.
Do this instead:
- For salt and dirt: Warm water with mild detergent, scrub with a soft brush, rinse thoroughly, and dry completely.
- For old sealant removal: Use a plastic scraper, not metal tools that can gouge the groove.
- For oil or grease: Isopropyl alcohol works on most surfaces. Avoid acetone or strong solvents unless you know they’re compatible with both the groove material and the new seal.
Problem #3: Waiting for Failure Instead of Preventing It
Most seal maintenance happens on a reactive schedule: “When it leaks, we’ll replace it.” This approach guarantees you’ll be doing emergency repairs at the worst possible time—usually at sea, often in bad weather.
Building a Proactive Inspection Routine
Professional marine operations inspect seals on a schedule, not when they notice problems. Here’s a practical inspection routine that takes minimal time but prevents major problems:
Every 30 Days (5 minutes per hatch):
- Visual inspection for surface cracking, hardening, or visible damage
- Check for proper seating—seal should sit evenly in groove with no gaps
- Look for salt buildup or debris in seal contact areas
- Test hatch operation—should close smoothly without excessive force
Every 90 Days (15 minutes per hatch):
- Clean seals with fresh water and marine-safe seal conditioner
- Check compression with thickness gauge at four points around perimeter
- Examine corners and splices for separation or degradation
- Document any changes from previous inspection
Annually (during dry dock):
- Remove and fully inspect seals under good lighting
- Measure hardness with durometer to check for material changes
- Replace any seal showing 25%+ compression set
- Update seal inventory and replacement schedule
The Five-Minute Seal Check That Prevents Disasters
You don’t need to be a materials engineer to spot problems early. Train your crew to do this quick check:
- Run your finger around the seal perimeter. Feel any hard spots, cracks, or sticky areas? That’s degradation starting.
- Close the hatch and look at the seal contact pattern. See even compression all around? Good. See gaps or uneven marking? Problem.
- Open the hatch and look for permanent deformation. If the seal doesn’t bounce back to its original shape within 30 seconds, it’s developing compression set.
- Check the corners. Any separation, cracking, or daylight visible through the seal? Document it and schedule replacement.
Catch these issues during routine checks, and you’ll never have an emergency seal failure again.
What Happens Next
In Part 2 of this series, we’ll cover the certification landscape you actually need to understand (not just the acronyms), how to specify custom seals for unique vessel requirements, and the step-by-step process for working with seal manufacturers to get exactly what your vessel needs—not what happens to be in stock.
We’ll also tackle the maintenance protocols that extend seal life from 3-5 years to 10-15 years, the storage practices that prevent shelf degradation, and what to do when you inherit a vessel with unknown seal specifications.
Work With People Who Understand Marine Reality
At Saga Elastomer, we’ve spent three decades manufacturing rubber seals for applications where failure isn’t acceptable. Our IATF 16949:2016 and ISO 9001:2015 certified facility produces EPDM, NBR, Silicone, Neoprene, and FKM seals engineered for marine environments.
But more importantly, we understand that every vessel faces unique challenges. Whether you’re dealing with harsh Arctic conditions, tropical heat, chemical exposures, or simply need to replace legacy seals with unknown specifications, our engineering team works with you to identify the right solution.
Get in touch with Team Saga to discuss your specific seal requirements. We’ll help you identify the right materials, verify compatibility, and develop a seal solution that actually works in your operational environment—not just on paper.
Contact us at: [email protected]